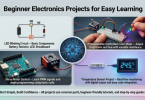
Introduction
Raspberry Pi has revolutionized the world of DIY electronics and programming. These tiny, affordable computers open up endless possibilities for hobbyists, students, and tech enthusiasts alike. With a Raspberry Pi, you can create anything from simple home automation systems to sophisticated AI-powered projects. Its versatility makes it an ideal platform for both beginners and intermediate users who want to learn coding, electronics, and practical problem-solving.
In this article, we will explore some of the best Raspberry Pi projects ideas that you can start today. Each project is designed to be accessible while also providing opportunities to expand your skills. We will cover detailed step-by-step guides, the benefits of these projects, potential risks, common mistakes, and expert tips to ensure your success. Whether you are looking for a fun weekend project or a serious learning experience, Raspberry Pi projects can be both educational and highly rewarding.
By the end of this guide, you will have a clear understanding of which Raspberry Pi projects suit your level, how to execute them efficiently, and how to avoid common pitfalls. Let’s dive into the exciting world of Raspberry Pi projects ideas and turn your creative concepts into reality.
What is Raspberry Pi Projects?
Raspberry Pi projects refer to creative and practical applications built using a Raspberry Pi, a small single-board computer. These projects can range from simple electronics experiments to complex IoT systems, robotics, and smart home solutions. Raspberry Pi itself comes in various models, each offering different processing powers, connectivity options, and memory capacities.
The term “Raspberry Pi projects” generally encompasses activities where you combine hardware components, such as sensors, motors, and LEDs, with software programming using languages like Python, Scratch, or Java. By doing so, you can create functional devices, automate tasks, and even develop prototypes for real-world applications.
The beauty of Raspberry Pi projects is that they encourage problem-solving, coding skills, and hands-on learning. Whether you are building a weather station, a retro gaming console, or a security camera, each project teaches valuable lessons in electronics, logic, and programming.
Why is Raspberry Pi Projects Important?

Raspberry Pi projects are more than just hobbies—they are gateways to innovation, learning, and career growth. Here’s why they are important:
- Hands-On Learning: Raspberry Pi projects allow you to learn by doing, which helps in understanding abstract concepts in electronics and programming.
- Cost-Effective: The Raspberry Pi is inexpensive, making it an affordable way to experiment with advanced technology without significant investment.
- Skill Development: Working on projects improves coding skills, circuit design knowledge, and problem-solving abilities.
- Creativity and Innovation: Projects encourage you to think creatively, combining software and hardware to solve real-world problems.
- Career Opportunities: Knowledge of Raspberry Pi can open doors to careers in IoT, robotics, AI, and embedded systems.
- Community Support: The large Raspberry Pi community offers tutorials, forums, and advice, making learning collaborative and enjoyable.
In short, Raspberry Pi projects provide practical experience that can be both educational and career-enhancing. They are a stepping stone to mastering modern technology in an interactive and engaging way.
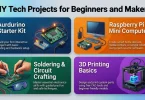
Detailed Step-by-Step Guide
Here are some of the most popular and beginner-friendly Raspberry Pi projects ideas, with steps to get you started:
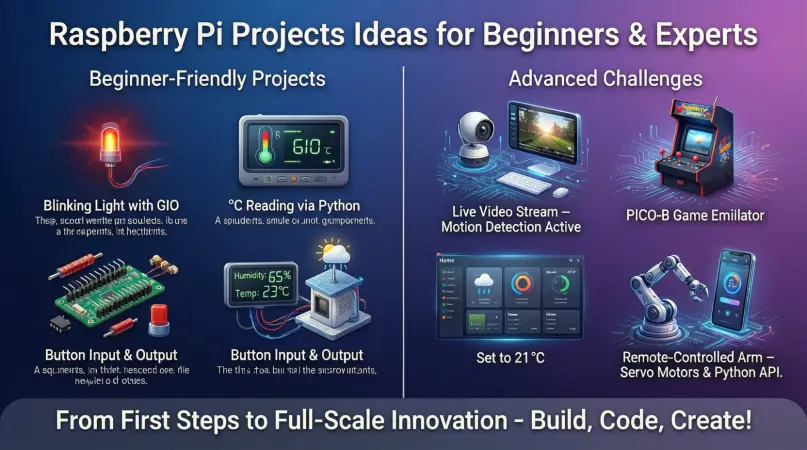
1. Raspberry Pi Home Automation System
Materials Needed: Raspberry Pi, relay modules, sensors (temperature, motion), LEDs, and software like Home Assistant.
Steps:
- Install the Raspberry Pi OS and set up Wi-Fi connectivity.
- Connect relay modules to control lights and appliances.
- Integrate sensors to detect motion, temperature, or humidity.
- Install Home Assistant to manage automation via a web interface.
- Program rules, such as turning on lights when motion is detected.
Outcome: Control your home appliances remotely or automatically, increasing convenience and energy efficiency.
2. Retro Gaming Console
Materials Needed: Raspberry Pi, microSD card, USB controllers, HDMI cable.
Steps:
- Install RetroPie on your Raspberry Pi.
- Copy retro games (ROMs) to your SD card.
- Connect your Raspberry Pi to a TV or monitor using HDMI.
- Configure controllers and customize settings for optimal performance.
Outcome: Enjoy classic games from Nintendo, Sega, and other platforms, all in one compact system.
3. Raspberry Pi Weather Station
Materials Needed: Raspberry Pi, temperature/humidity sensor, rain sensor, wind sensor, optional camera module.
Steps:
- Connect the sensors to the Raspberry Pi’s GPIO pins.
- Install software to record and display weather data.
- Create graphs and dashboards to monitor real-time conditions.
- Optionally, set up automated alerts via email or SMS.
Outcome: Track local weather conditions accurately and even share the data online.
4. Security Camera System
Materials Needed: Raspberry Pi, camera module, microSD card, motion detection software.
Steps:
- Attach the camera module to the Raspberry Pi.
- Install motion detection software like MotionEyeOS.
- Configure storage for captured footage.
- Set up alerts for movement detection.
- Access the camera remotely via your network.
Outcome: Monitor your home or office with a low-cost, DIY security solution.
5. Personal Web Server
Materials Needed: Raspberry Pi, microSD card, Ethernet or Wi-Fi connection.
Steps:
- Install Raspberry Pi OS.
- Set up Apache or Nginx web server software.
- Host your personal website or portfolio.
- Secure your server with basic firewall and login protections.
Outcome: Learn web hosting and server management while running your personal projects.
6. Smart Mirror
Materials Needed: Raspberry Pi, two-way mirror, monitor, frame, software like MagicMirror.
Steps:
- Install MagicMirror software on the Raspberry Pi.
- Connect the monitor behind the two-way mirror.
- Customize modules for time, weather, calendar, and news feeds.
- Mount everything in a frame to complete the smart mirror.
Outcome: A functional, interactive mirror that shows useful information while you get ready.
7. Raspberry Pi Music Streaming Device
Materials Needed: Raspberry Pi, speakers, audio software like Volumio.
Steps:
- Install Volumio on your Raspberry Pi.
- Connect your audio output device.
- Load your music library or connect to online streaming services.
- Control playback via mobile app or web interface.
Outcome: Stream music seamlessly at home using your Raspberry Pi as a mini audio hub.
8. Robot Car with Raspberry Pi
Materials Needed: Raspberry Pi, motor driver, DC motors, wheels, sensors, chassis.
Steps:
- Assemble the robot chassis and attach motors.
- Connect sensors to detect obstacles.
- Program the Raspberry Pi to control movement using Python.
- Optionally, enable remote control via Wi-Fi or Bluetooth.
Outcome: Learn robotics, sensor integration, and programming in a practical way.
Benefits of Raspberry Pi Projects
- Affordable and accessible for beginners
- Hands-on learning for electronics and programming
- Encourages problem-solving and creativity
- Wide variety of projects, from fun to practical
- Builds technical skills applicable in careers
- Strong community support and online resources
- Customizable and expandable over time
Disadvantages / Risks
- Limited processing power compared to full computers
- Requires patience for troubleshooting
- Some projects need extra hardware and peripherals
- Risk of short circuits if components are mishandled
- Learning curve for beginners without programming experience
- Power supply issues can cause instability
Common Mistakes to Avoid
- Skipping Tutorials: Always follow official guides for beginners.
- Using Incorrect Voltage: Ensure sensors and peripherals match Raspberry Pi’s voltage.
- Ignoring Updates: Keep Raspberry Pi OS and software updated.
- Overloading GPIO Pins: Avoid connecting too many components at once.
- Neglecting Security: Change default passwords and configure firewalls.
- Poor Cable Management: Prevent accidental disconnections or damage.
FAQs
1. Which Raspberry Pi model is best for beginners?
The Raspberry Pi 4 is ideal for beginners due to its speed, RAM options, and connectivity. However, Raspberry Pi Zero is great for small, low-cost projects.
2. Do I need coding skills to start Raspberry Pi projects?
Basic knowledge of Python or Scratch is helpful, but many beginner projects have step-by-step guides. You can learn coding as you go.
3. Can Raspberry Pi handle multiple projects at once?
Yes, but it depends on the model and resources. Raspberry Pi 4 can run multiple lightweight projects, while Pi Zero may struggle.
4. What is the safest way to power a Raspberry Pi?
Use an official Raspberry Pi power supply to ensure stable voltage and avoid damage.
5. Are Raspberry Pi projects suitable for kids?
Yes, with adult supervision, Raspberry Pi projects teach coding, electronics, and creativity safely.
6. Can Raspberry Pi connect to the internet?
Yes, Raspberry Pi supports Wi-Fi and Ethernet, allowing for IoT projects, web servers, and remote access.
7. How long do Raspberry Pi projects typically take?
It depends on the complexity. Simple projects can take a few hours, while advanced projects like home automation or robotics may take several days or weeks.
8. Can I sell a project made with Raspberry Pi?
Yes, but check licensing for software and hardware components. Many hobbyists commercialize their projects successfully.
Expert Tips & Bonus Points
- Always start small: Begin with one or two sensors or devices.
- Backup your SD card: Save your work to avoid losing progress.
- Label wires and components: Makes troubleshooting much easier.
- Experiment with Python libraries: Libraries like GPIO Zero simplify coding.
- Join the community: Raspberry Pi forums offer advice, project ideas, and support.
- Upgrade gradually: Once confident, add more sensors, cameras, or motors.
- Document your projects: Keeping notes helps replicate or improve your work.
Bonus Tip: Explore combining multiple projects, like a smart mirror that streams music or displays weather data, to create unique and functional devices.
Conclusion
Raspberry Pi projects ideas provide an incredible opportunity to learn, create, and innovate. They are accessible to beginners yet versatile enough for intermediate users to expand their knowledge. From building home automation systems to retro gaming consoles, security cameras, smart mirrors, and robotics, the possibilities are endless.
By following step-by-step guides, avoiding common mistakes, and leveraging expert tips, you can maximize your learning and enjoy tangible results. The skills gained through Raspberry Pi projects—programming, electronics, problem-solving—are highly transferable and valuable in today’s tech-driven world.